ZoomTimeline Ultimate Timeline Pack
documentation
Table of Content
- Item Name : ZoomTimeline - Ultimate Company Pack
- Author: ant_farm
- Support is provided via item comments
Looking for a company timeline ? A shipping log ? Shipping history ? Personal History ? A cool timeline slider ? This plugin has it all. No matter the needs for a timeline, the six modes included cover all the timeline needs.
Awesome for - company timeline, time line, history, company history, shipping history, parcel track display, timeline slider.
Getting Started #back to top
ZoomTimeline does not require a php server to run properly as all files are static ( demo files in source can even be opened by double clicking ), so you can edit the html files right from the source/ folder. If changes are needed to the css files, these are recommeded to go in your own css file not in zoomtimeline/zoomtimeline.css file.
All you have to do for installing on your site (ie. yoursite.com) is copy the contents of the /source folder to a folder (ie. yourfolder) on your site via ftp ( with filezilla ) or any other upload service. You can then access your contents via http://yoursite.com/yourfolder.
How to Install in your Project#back to top
Setup on Local Server
In order to install this component in your html page you need to:
- unpack the download package, open the source folder

- copy the folder /dzsscroller, /zoomtimeline, /zoombox into your project folder
- open your html file and insert this inside your <head> tag
<script type="text/javascript" src="https://ajax.googleapis.com/ajax/libs/jquery/1.11.1/jquery.min.js"></script>


<link rel="stylesheet" href="https://maxcdn.bootstrapcdn.com/font-awesome/4.5.0/css/font-awesome.min.css">
<link href="./zoomtimeline/zoomtimeline.css" rel="stylesheet">
<script src="zoomtimeline/zoomtimeline.js"></script>
<link rel='stylesheet' type="text/css" href="zoombox/zoombox.css"/>
<script src="zoombox/zoombox.js"></script>
<link href='dzsscroller/scroller.css' rel='stylesheet' type='text/css'>
<script src="dzsscroller/scroller.js"></script>
note: if you already have included jQuery in your document, do not include it again, jQuery should only be included once
note: if you do not want mode-timelineslider functionality, then the dzsscroller/ libraries are optional
note: if you do not want lightbox functionality, then the zoombox/ libraries are optional
- insert this inside your <body> tag where you want the plugin to appear
Mar 1990
The Beggining
New mettings every week dolor sit amet, consectetur adipisicing elit, sed do eiusmod tempor incid [...]
Jun 2000The Gallery
New mettings every week dolor sit amet, consectetur adipisicing elit, sed do eiusmod tempor incid [...]
Sep 2005The New Office
New mettings every week dolor sit amet, consectetur adipisicing elit, sed do eiusmod tempor incid [...]
2 days agoThe New Building
New mettings every week dolor sit amet, consectetur adipisicing elit, sed do eiusmod tempor incid [...]
- modify settings ( emphatized ) and content to your wish
- All done!
How to Customize #back to top
General Item Structure - #back to top
                                        2 days ago


                                    The New Building
                                    New mettings every week dolor sit amet, consectetur adipisicing elit, sed do eiusmod tempor incid
                                        [...]
The featured image of the item is defined in the data-image attribute. In the hex-desc-con div, you can set the date. Choose any format for the date - x days ago, 23 MAR, 19-10-2016 etc. Any html is accepted here. In the ztm-content, the item content is to be edited. Like in the hex-desc, any html is accepted here. You can insert videos, or for example a lightbox gallery, ie:
                              The Gallery
                              New mettings every week dolor sit amet, consectetur adipisicing elit, sed do eiusmod tempor incid [...]
Auto Script Call - #back to top
The easiest way to initialize the timeline is using the auto-init class on the main zoomtimeline container.
[...]
But if you want to control the initialization or if you have a ajax website, this is a script initialization of the timeline.
[...]
Options - #back to top
Classes options
You can add any of these classes to the zoomtimeline main container- mode - choose from mode-default, mode-oncenter, mode-slider, mode-yearslist, mode-blackwhite or mode-masonry
- skin - ( will only have effect on mode-oncenter for now ) choose from skin-light or mode-dark
Lightbox options - #back to top
To customize lightbox options, just add this before the ending of the </body> tag
Files & Sources #back to top
These are the essential files for the timeline to work
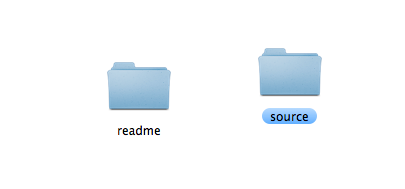
- readme/ - readme file
- source/zoomtimeline/ - main stylesheets and script files that control the timeline
These are the included optional components.
- source/dzsscroller/ - style and scripts for the custom scrollbar ( required for mode-slider )
- source/zoombox/ - style and scripts for lightbox functionality
Developer Options #back to top
* This chapter is for developers only.
Recommended Programs
You can generally use any text editing software [ like notepad ] to edit content/code but this is what I recommend:
- .html / .css- Sublime Text
- .js - Sublime Text
- .scss - Netbeans with SASS plugin
SASS
If you are a developer you will notice there are some .scss files included too. This is the language for a css preprocessor which makes a developer's life easier. This is optional but if you want to try it here is the site.
Changes to core JS and CSS files
If you want to make css adjustments, it's best that this is done inside a custom.css file and imported into your html. Reason for that is, when updating we will update the core folders too, and so if you have your css separate, you can overwrite the core ( zoomtime/ ) folder safely.
If you want to make js modifications, you are kind of limited to the core js files. And so you lose your js changes on update. So, if you do need to do changes to the js files, the only way to keep your changes, is to compare your modified file with the updated js with a diffchecker. Online diff checkers are also available - https://www.diffchecker.com/. We do not offer support or take responsability, for modified plugin versions.